> For the complete documentation index, see [llms.txt](https://giantgrey.gitbook.io/tileworldcreator-v4-documentation/llms.txt). Markdown versions of documentation pages are available by appending `.md` to page URLs; this page is available as [Markdown](https://giantgrey.gitbook.io/tileworldcreator-v4-documentation/configuration/blueprint-layers.md).
# Blueprint Layers
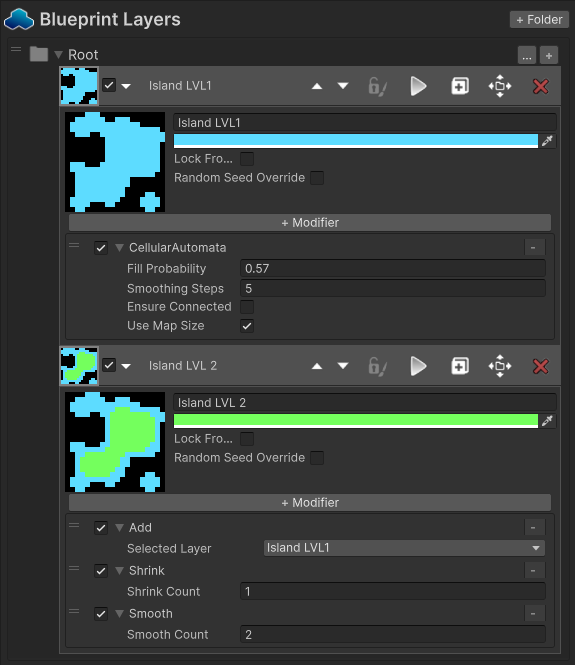
A blueprint layer defines a map using cells on a grid. You can create a map by manually painting cells or by using generators and algorithms. Here's a simple example that uses two blueprint layers.
{% hint style="warning" %}
Layers are executed from top to bottom including their modifiers. So always make sure the order is correct when creating a blueprint stack.
{% endhint %}
You can see that the second layer (Island LVL2) starts by using the LVL1 map as a base with the **Add** modifier. Then, a **Shrink** modifier is applied to reduce its size. Finally, a **Smooth** modifier is used to soften the shape and remove sharp edges.
There are many modifiers available, including some more complex ones. The best way to understand them is to experiment and see how they affect your map.
Read more about painting layers or using modifiers:
{% content-ref url="/pages/zHf4WVHxB4SOZUbhJ8jU" %}
[Paint Map](/tileworldcreator-v4-documentation/configuration/blueprint-layers/paint-map.md)
{% endcontent-ref %}
{% content-ref url="/pages/qGycxYPGWmkHLMTdUCz9" %}
[Generators & Modifiers](/tileworldcreator-v4-documentation/configuration/blueprint-layers/generators-and-modifiers.md)
{% endcontent-ref %}
## Organize Layers
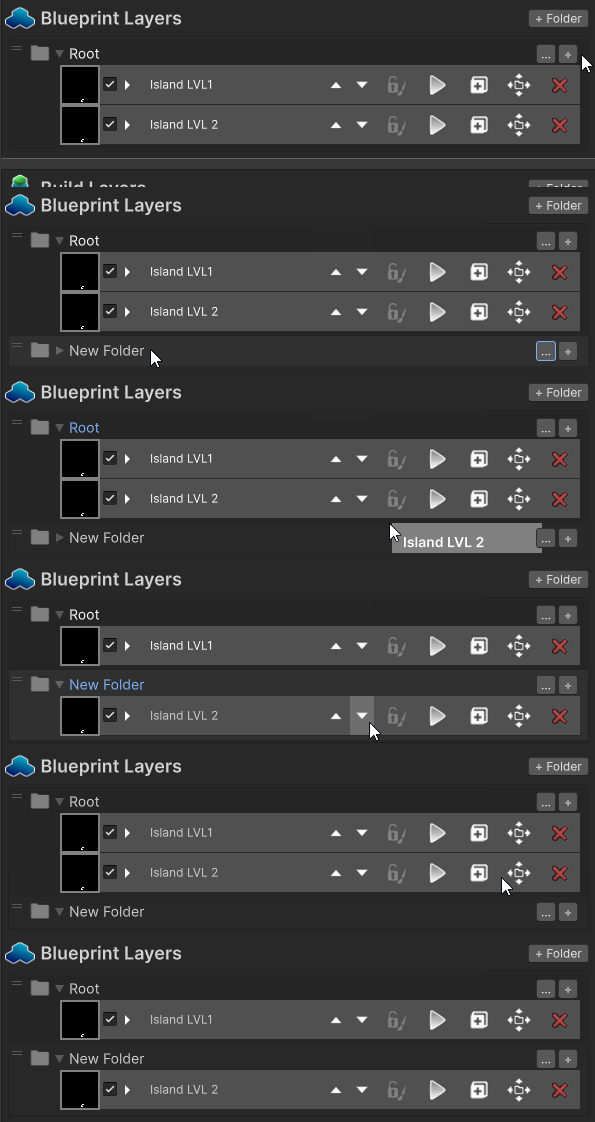
In Version 4, layers can now be organized into folders for better structure. To create a new folder, simply click the **+ Folder** button. You can move layers into a folder by clicking the **Move to Folder** icon and dragging the layer into your desired folder.