QuickStart
This is a step by step tutorial for creating your first Databox object and adding data to it.
Create a Databox object
A Databox object serves as a container for your data. Each Databox object can be configured with a different save path. This means that you could have multiple Databox objects in your project each handling different files in different locations.
For example you could use two Databox objects in your project to handle initial game data and save files. The save files Databox object would be then just an empty Databox object pre-configured with the correct save path.
You can change a save path during runtime.
Right click in the project view and select:
Create / Databox / New Databox ObjectSelect the newly created Databox object and click on
ConfigSelect the
StreamingAssetsfolder and make sure that you have a folder in your project namedStreamingAssetsRead more about all save paths here: Concept & Workflow
Add Data
You are now ready to add your data. Databox has its own Databox variable classes which can be used to create complex data classes including nested classes, lists and complex GUI based on the Unity IMGUI.
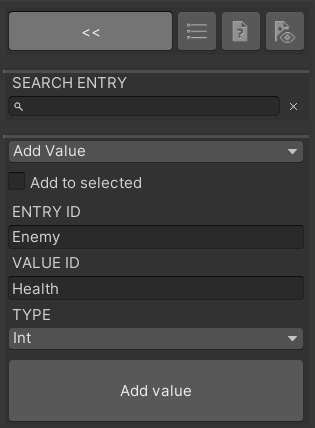
First we need to add a table. Enter a name for your table, for example:
Table1and click onAdd TableSelect the newly created table tab.
You can now add an entry. Each entry can contain multiple values.

Enter
Enemyas entry name andHealthas value name.Because health should be an integer lets select the
Inttype.Click on
Add Value
Great! You have successfully added your first data.
Modify Tables
You can modify tables anytime by clicking on the three ... dots next to the table tabs.

Complex Data
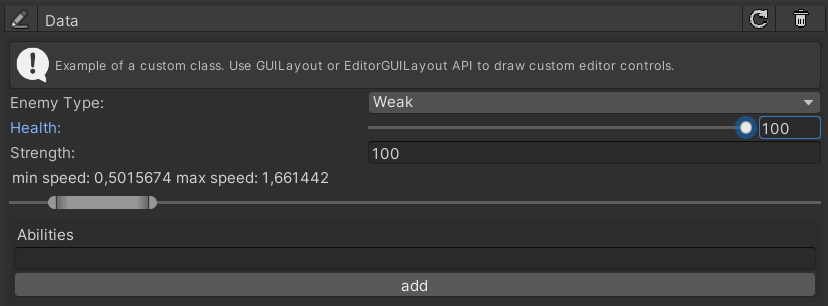
Databox variable types are not limited to contain only one type for each value entry. As an example lets add the ExampleClass
Enter a new name in the value field
Select the
ExampleClasstypeClick
Add Value
As you can see, this example class has much more then just one value. You can also create complex UI based on the Unity IMGUI. Simply open the file ExampleClass file in your script editor to see how this was achieved. More information about creating your own Databox Data type head over to:
Custom Data Type
Save
Now that you have added your data you need to save it to your file. Simply click on Save in the Databox Object editor. You can also enable automatic saving in the config menu. Please note this only works in the Unity editor during design time.
Load
To load a file, simply select Load in the Databox object.
Last updated


